Well last weekend was wasted getting called out to work due to breakdowns so this week has been spent doing the doors and the front passenger fender rust repairs (the last ones to do - yay). Anyway its 80% finished now got a bunch of pictures to throw up and i lost a bunch too because of a failure of SD card :(. Anyway thats all sorted now. this weekend ALL rust repairs should be finished and ALL the sealing should be finished (inside doors and the inside of the front fenders, the bonnet and the boot. then the car will be assembled and the bodywork will begin of which i'll throw some pictures off in due course.

Ok the pictures are back to front so bear with me. This is the rear of the front passenger door after having a new backing plate welded in and the old piece dummied up to ensure correct dimensions. (and show hideous hole)

This is the old backing plate on the same section.

The rust on the top rear of the front passengers door, while the hole looks small and probably 'bogable' the problem is the rust expands in behind the metal and causes it to stick out (quick far) making the perfect bodywork required for a black paint job, impossible. So cutting it all out and putting a little plate in after removing the rust from behind it.

The rust on the leading edge of the bottom of the passengers door front.

The rust on the rear of the passengers door front before cutting it out (see bog filling whole.)

This is the rear passengers door after having both of its rust repairs completed and being sprayed with epoxy primer. Not too many dents in this panel, nothing major.

The rust repair on the rear of the rear passengers door after repair before paint.

The rear passengers door with both repairs before sanding and painting.

The rust repair on the front left fender. There are also several dents on the top of this panel no idea how they happened.

This is SOME of what is required to finish this car, albiet the fast majority of whats required for the paint coat and 50% of the bodywork.
8l 'Super jet black' basecoat paint
8l 2k Clear coat (extra but didnt wanna run out with only 4l)
4l of BOG!
1L of Fine fill putty.
1L of 2k Spray putty
4l of 2k high build primer (gray), will probably buy another 4l depending on how bad the body lines are and how much i have to build it up and block it down to get everything lining up perfectly.
Anyway that will do for now, its been a long week and sorry for no updates (Craig has to keep reminding me as I bounce between work and the Impala and sometimes forget to do it :P). Hopefully the body will start taking shape pretty soon So I can get this tank sized car outa my 'shed' and Craig can drive arround in his fancy 'new' car.

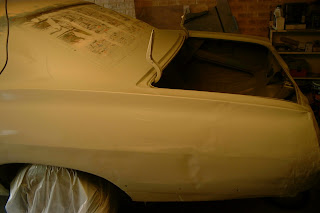
Oops forgot to post this picture, this is where the body is at currently. Ready to be re-assembled, The roof has allready been blocked down from the original paint (which was still good quality, with no bog or rust) So there wont be too much bodywork up there.

Enough talking here's pictures.


